In the fishkeeping hobby, the term “paludarium” has been gaining lots of recognition recently. After all, they can house elements from all types of tanks and combine them into one.
These fun-to-build captive spaces let you create a diverse habitat – whether a rainforest, a waterfall, or something else! And as you pursue this hobby, you bring out the true essence of your creative skills.
So, if you also want to build your very own slice of nature within your home, c’mon, let’s dive in…
What is a Paludarium Tank?
A paludarium is a tank with both water and land – focused on housing aquatic, semi-aquatic, and terrestrial plants and animals.
The term paludarium comes from two words: paludal (meaning marsh) and arium (meaning enclosure).
Some even call it an aqua terrarium or a type of vivarium. But these big words are bound to confuse most beginners. So, here’s a breakdown for a better understanding.
- Vivarium: Captive setups that mimic nature. Some types are aquariums, terrariums, and paludariums. Nowadays, the term is used for reptile tanks.
- Terrariums: Captive setups for only land-dwelling species.
- Riparium: Captive space made to mimic the edge of waterbodies like rivers, ponds, lakes, or streams.
What are the Types of Paludarium Tank?
You can make a variety of themed paludariums. So, you must first figure out what kind of tank you want and also what elements are available to you. C’mon, let’s take a look at the basic options.
1. Tropical Rainforest
This is the most popular style of all paludariums. The inspiration comes from the Amazon, African, Southeast Asian, or any rainforest or jungle. It’s a beautiful contrast of colors between driftwood and dense wild plants.
The best choices for these setups are:
- Fish: Angelfish, discus, cardinal tetra, neon tetra, zebra danio, giant danio, molly
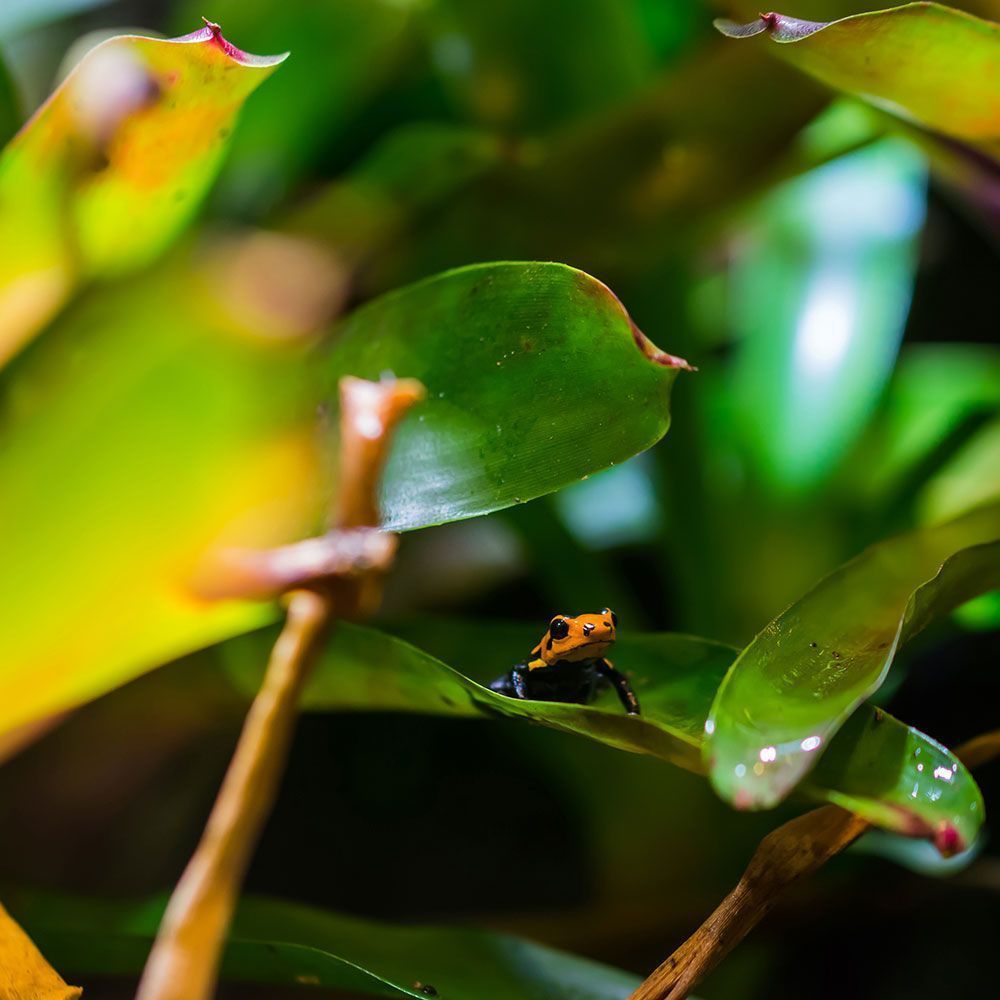
- Amphibians: Tree frog, poison dart frog
- Terrestrial Plants: Orchid, bromeliad, epiphytic fern, sword fern, maidenhair fern
- Aquatic/Semiaquatic Plants: Java moss, anubias
2. Mangrove Swamp
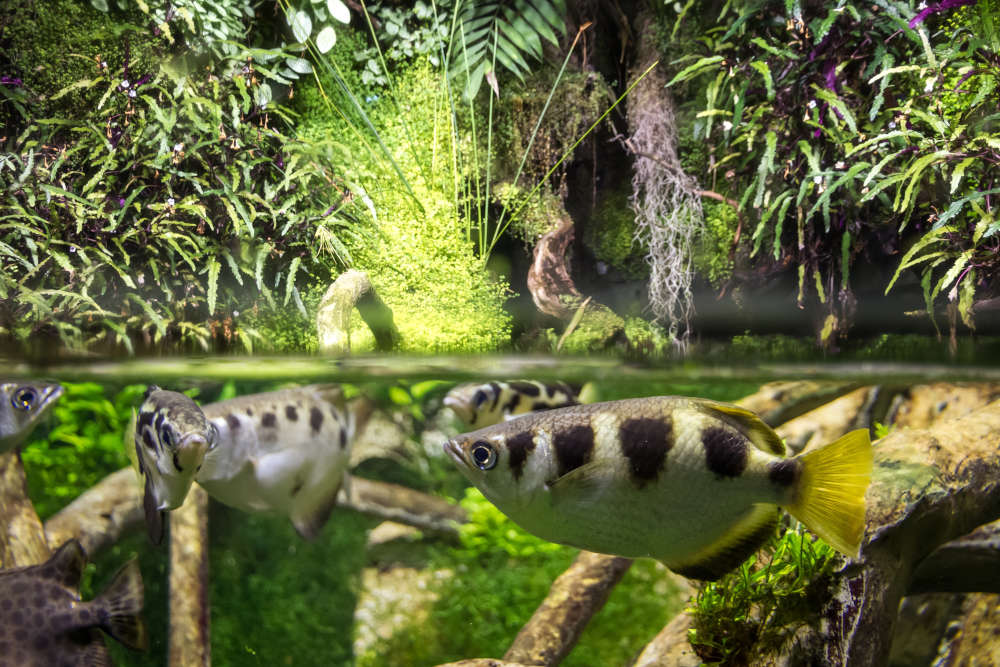
This one features a mix of the tropical environment and brackish waters, just like around the mangrove tree roots. But of course, you can’t put mangrove trees in tanks. So, mopani wood or ghostwood is used as a substitute.
Favorable choices for these setups are:
- Fish: Mudskipper, molly, archerfish
- Semiaquatic Species: Red claw crabs
- Terrestrial Plants: Mini orchids, bromeliads
- Aquatic/Semiaquatic Plants: Java ferns, anubias, cryptocoryne, tapegrass, lemon bacopa, duckweed (floating plants)
3. Turtle Habitat
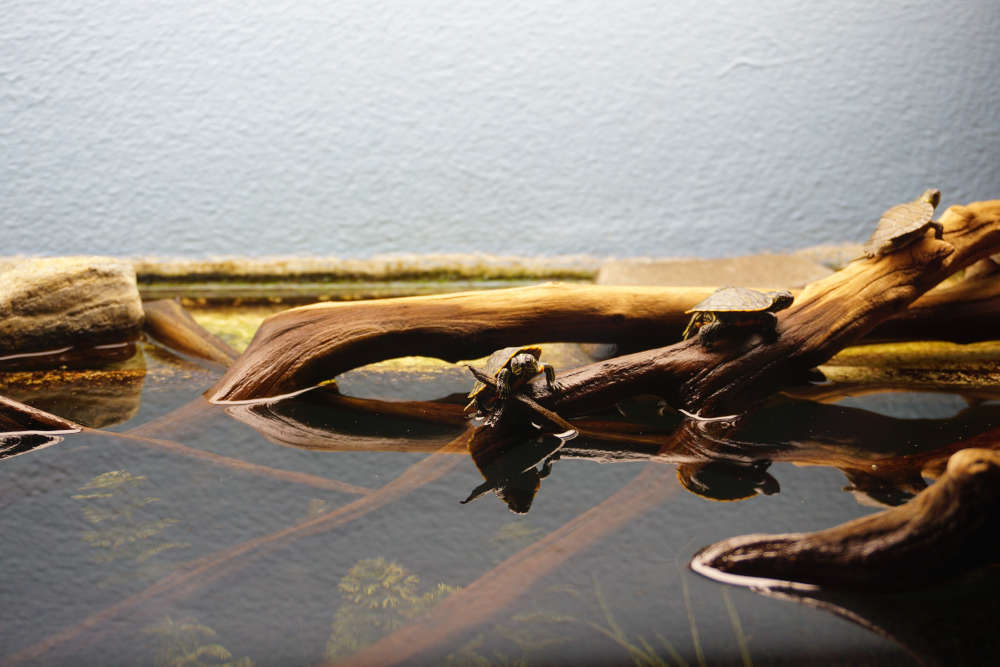
One of the toughest paludarium types – focused mainly on turtles and no fish/invertebrates. The details depend on the type of turtle and its needs. But usually, it includes:
- Substrate: Fine grains, Moist potting soil
- Hardscape: Rock, Log
- Terrestrial and Semiaquatic Plants: Creeping vine, Bracken fern, Liverwort
- Aquatic Plants: Moneywort vine, Bladderwort, Waterweed
4. Brackish Coastline

This theme mimics the sandy bays of brackishwater environments. It usually involves the following:
- Fish: Blenny, Goby, small minnow
- Semiaquatic Species: Fiddler crabs
- Aquatic Plants: Tapegrass, marimo moss, algae
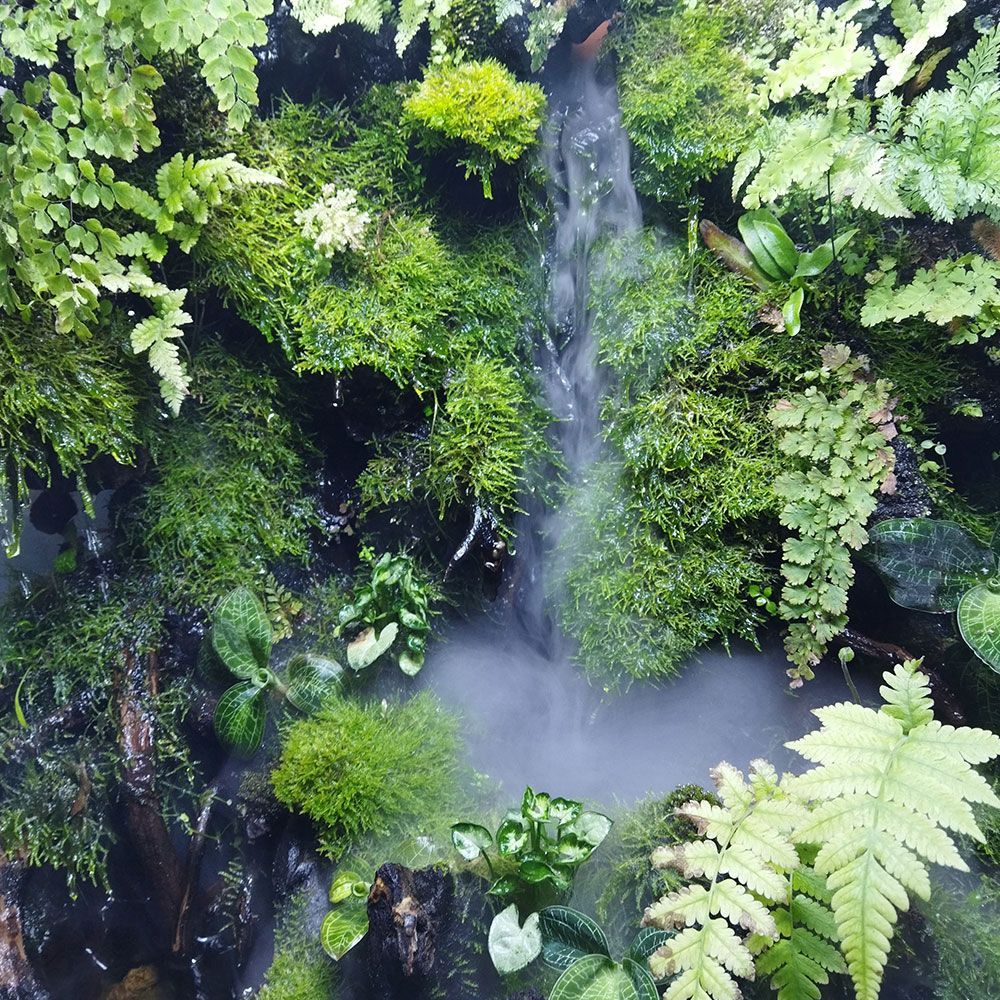
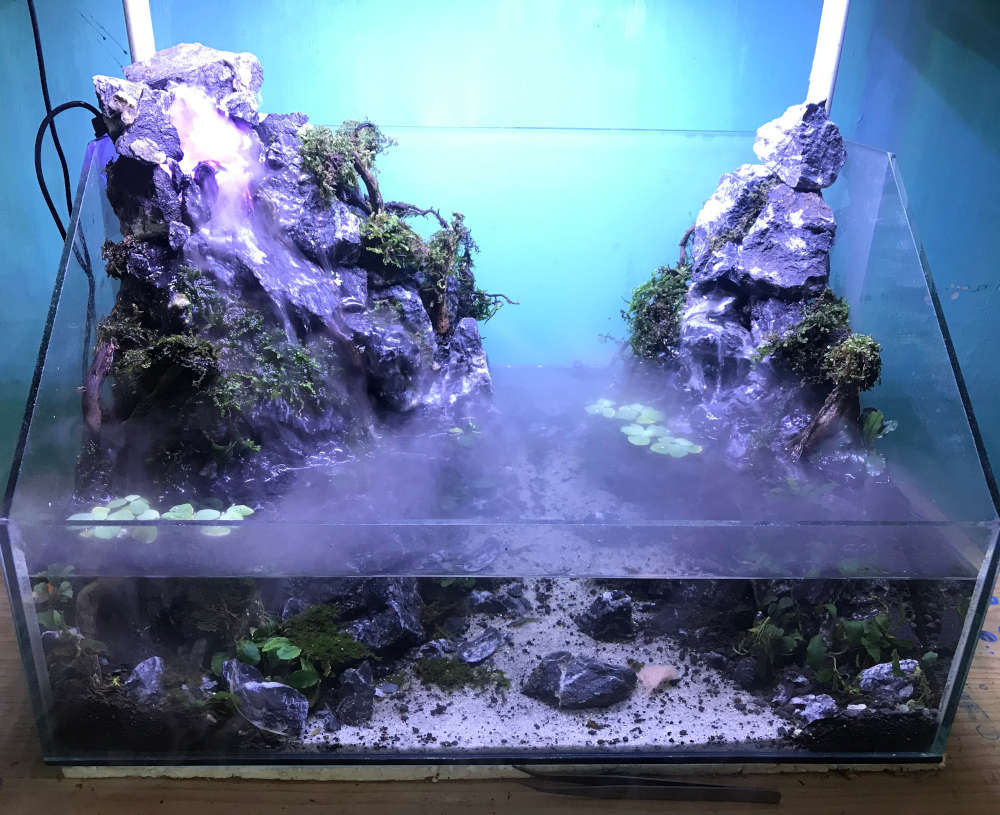
5. Cave/Waterfall Paludarium
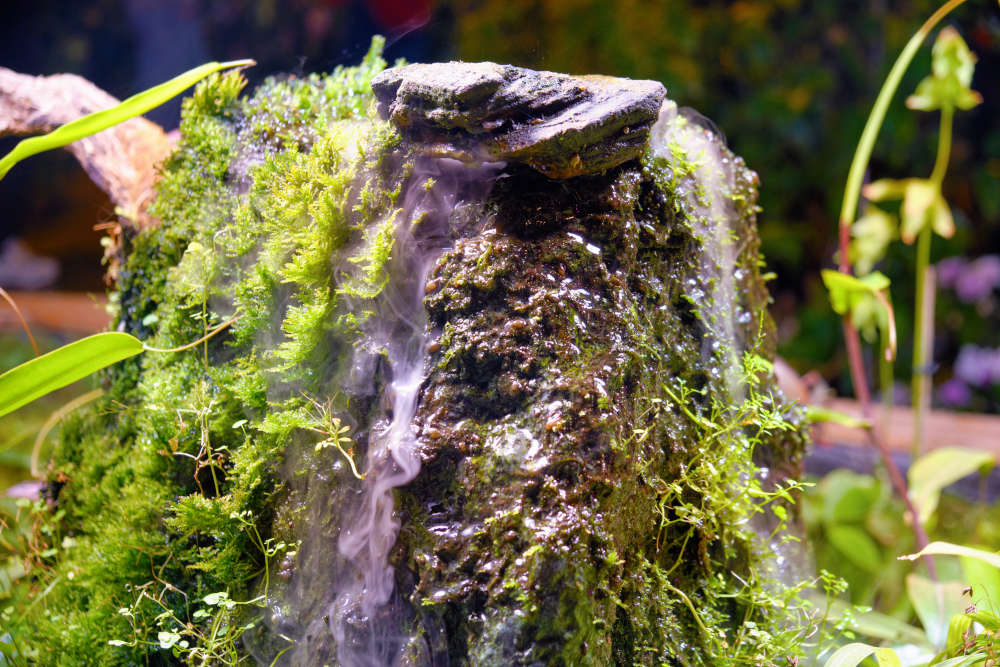
In these, you can create a cave or waterfall by gluing lightweight aquascaping stones like dragon or seiryu stones. This setup looks the best in square tanks. Epiphytes, semiaquatic epiphytes plants (Anubias and Bolbitis), and hypnum moss suit them the best.
Such setups need fogging or misting systems to keep the environment humid and your plants thriving.
6. Volcano Paludarium
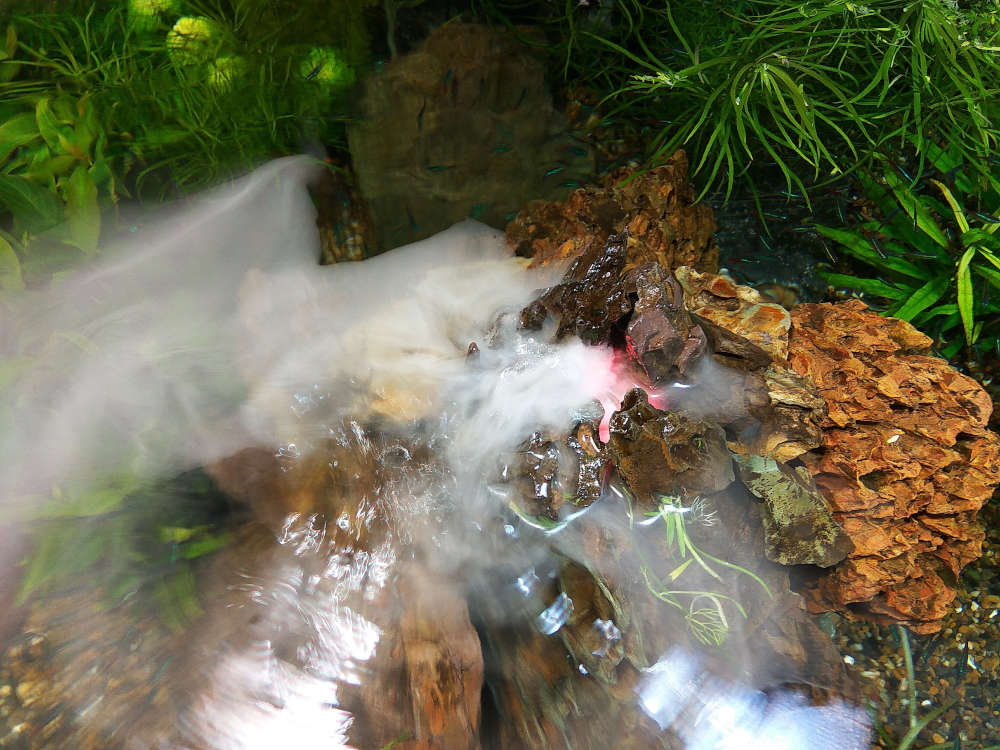
With glued lava rock, you can create a mini volcano-like shape. Using a pump, you can direct water to flow out of the system. Since lava rock is porous and lightweight, it would soak the water and make a great space to grow epiphytes.
7. Island Paludarium
Water surrounds a small land from all directions in this one. This type allows you to get creative with all sorts of plants, hardscapes, and island shapes and alignments.
What are the Essential Elements of Paludarium Tank?
Now, to begin your own paludarium project, you need to gather some basic items, which include…
1. Flora & Fauna
While choosing flora and fauna, ensure you choose ones with similar environmental needs – freshwater, brackishwater, and saltwater, water chemistry, and other things.
You must also ensure that no plant or animal species get into conflict or hurt each other. For instance, some plants may be toxic for specific species and not for others.
So, first, let’s check your options here…
a. Flora
You can choose from a variety of plants based on your needs, like:
Fully Aquatic Plants: Amazon sword, anubias, java moss
Note: Avoid tall plants for this section to prevent it from looking messy.
Floating Plants: Duckweed, water lettuce, mosquito fern, banana lily, lotus
Note: These are great for reducing nitrates. But floating plants may cause lighting issues to submerged plants.
Partially Submerged Plants: African water fern, golden pothos, devil’s ivy, miramar weed, dwarf hygrophilia, lucky bamboo
Terrestrial Plants: Orchids, creeping fig, java fern, club moss, pillow moss
Note: Opt for species that love high-moisture environments.
Epiphytic Plants (These plants grow on other plants): Bromeliads, tillandsia air plants
b. Fauna
While choosing fish, you can stick to only a few types to avoid building clutter. Some popular choices of fish are:
- Killifish
- Cichlid
- Danio
- Molly
- Guppy
- Gourami
- Tetra
- Rasbora
- Archerfish
- Betta
- Pygmy corydoras
- Bala shark
- Mudskipper
- Blenny
- Minnow
You can also add invertebrates like
- Red bee shrimp
- Blue dream shrimp
- Ghost shrimp
- Amano shrimp
- Cherry dwarf shrimp
- Mystery snail
- Springtail crab
- Fiddler crab
For your semi-aquatic inhabitants/amphibians, here are some great options:
- Toads
- Dart frogs
- Tree frogs
- Turtles
- Salamanders
- Newts
- Mudskippers
- Water dragons
Snakes and lizards are also options if you have the right setup and species that can coexist.
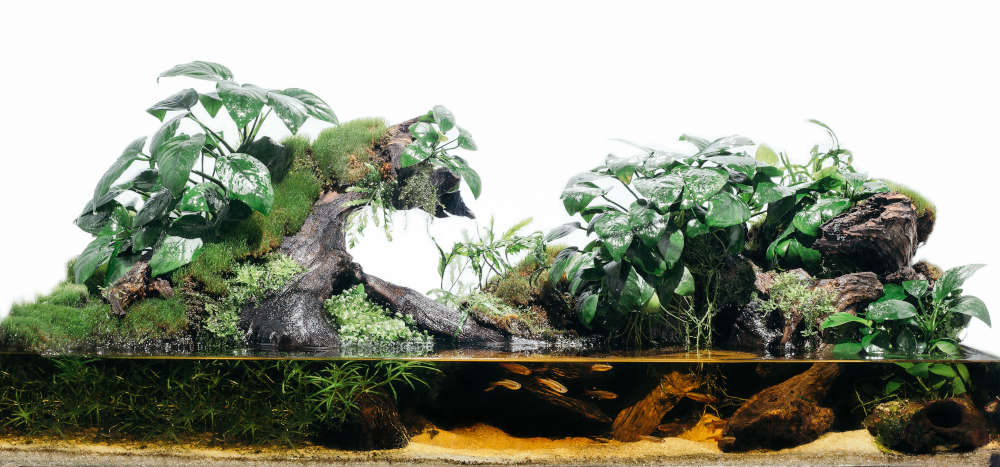
2. Waterfalls
Some may say waterfalls are a must-have for paludariums, but there’s no hard-and-fast rule.
But if you still want it, create an elevated surface using rocks, wood, or both. Let the water cascade down the structure with an external filter, powerhead, internal power filter, or PVC tubes.
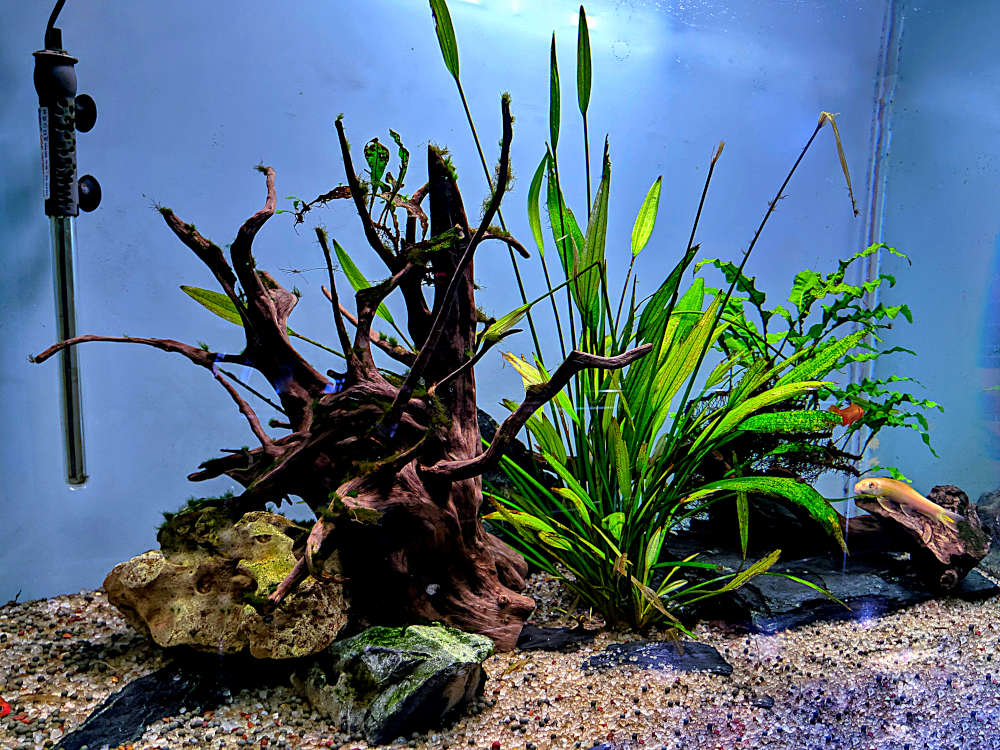
3. Tanks
The minimum tank size for a paludarium is 15-20 gallons. Any smaller than this won’t have enough space to decorate land and water. They won’t even run proper filtration and need frequent manual cleaning.
There are paludariums of up to 100 gallons. But in my experience, those may overwhelm beginners.
You can also choose a broader or taller tank depending on the theme, your preference, and space availability.
Opt for an open-lid tank to let plants grow beyond the tank boundaries. If there are animals that may come out of the tank, use a closed-lid tank.
4. Substrate
In a paludarium you can use the following substrate in particular sections:
- Sand: It works fine for open-water regions.
- Gravel: This is a good option to add texture to your sandy substrate and fill gaps between hardscapes to make them more sturdy.
- Aquasoil: It’s used in the land section to grow aquatic and semiaquatic plants.
- Peat moss: It works great as a top soil layer for being absorbent and also balances pH.
Note: Sand and gravel are inert and can only support epiphytes and air plants. Use fine grains as the bottom layer, medium grains like gravel as the middle layer, and dry soil as the top layer.
5. Hardscape
For the paludarium hardscape, you can choose from the following:
- Substrate Matter: You can always keep it minimalistic with a brown and black substrate mix for your hardscape.
- Lava Rock: These rocks add great texture and are a great way to keep land and water components separate. It’s mess-free when rinsed before use and holds good bacteria.
- Wood: You can choose from a variety of driftwood or bogwood. Just make sure you soak them to leach the tannin and scrub out any rough edges that may hurt your tank inhabitants.
6. Kits
You can grab yourself the following kits to achieve your paludarium project and maintain it properly.
a. Water Testing Kit
Monitor your water parameters as in a regular aquarium. It should have a pH, nitrite, and nitrate testing kit and thermometer.
This will be useful during the cycling of your tank before adding your fish and other animals to the tank.
b. Dechlorinator
If you’ll use tap water to fill your tank, use a dechlorinator or a water conditioner. This will remove all sorts of toxins like chlorine.
c. Gravel vacuum
This will help you remove all the waste from your animals – both on land and water.
d. Humidity Setups
Your terrestrial and semi-aquatic plants need a lot of humidity to stay healthy. You can achieve these using the following…
- Install an Enclosed Tank: A totally closed setup can trap moisture and help with the humidity issue easily. But sometimes, the humidity may fog up the viewing panes.
- Add Fog Makers: If you want an open-top setup, invest in terrarium foggers. Choose a product that’s compatible with reptiles and amphibians. This is also a great choice for waterfall-themed setups.
- Get a Pump with a Fine Spray Bar: Pump the water from your water region to the land region. Let the water run through a fine spray bar that won’t splash your animals.
- Manually Add Mist: If you have the time to invest, you can also add some mist with a garden misting bottle manually. Do it multiple times a day, and your tank inhabitants will be fine.
e. Aquascaping Kit
An aquascaping kit has all the necessary objects you need to plant, shape, and trim your vegetation. You won’t have to worry about getting each tool separately.
f. Paludarium Kit
Some beginners get confused by so many steps and things they need to gather. For them, there are ready-to-build kits that contain a paludarium, filter, different kinds of lights, substrate, and a variety of decor. The kits can be of nano, tall, and wide paludariums.
7. Mandatory Supplies
Other than these, there are a few more things that you will need to ensure the good health of tank inhabitants, like:
a. Lighting
There are both plants and animals in different levels of your paludarium. So, you need to ensure you use the right kind of light to illuminate the levels properly.
You have three options – fluorescent, compact, or LED lights.
LEDs are the most favorable as they’re easily maintained. The full spectrum light of LEDs also provides the necessary photosynthetically active radiation (PAR) and gives a natural look. Only low and medium-light plants can do without LEDs.
If you have basking animals (turtles and lizards), you should get basking bulbs that produce heat and enough brightness.
To choose the right wattage bulbs, consider
- Distance between floor and light
- Area to be lighted
- Types of animals and plants in the setup
b. Filtration
Canister filters are the best for paludariums for the following reasons:
- Efficient
- Low noise
- Customizable filter media
- Has good outflow, i.e., lets water be directed toward the upper region of the tank.
For smaller paludariums, another choice is a submersible internal canister filter. Especially if you have enough plants in the water region and have minimal animals, you can completely ditch the mechanical filter and go for this.
c. Heater
To regulate the temperature of your paludarium, you also need a heater matching your tank water volume. You can go for the standard heaters or compact ones designed for these setups.
d. Egg Crate
Egg crates are one of the most sought-after building materials in paludariums for the following reasons:
- They don’t leach chemicals into the water, making them safe for plants and animals.
- They’re easy to shape using a knife or shears and build structures.
e. Expanding Spray Foam
This is another excellent material to create an airtight water seal to separate your land and water regions.
You can also add it to your rocks and crates to give it a bulky shape and make it stronger. But ensure you get foam of the right color for that.
Wear gloves while using the foam and introduce water and animals only once the foam dries.
How to Create a Paludarium Tank?
By now, you should have a clear idea of the important materials and gears and compatible plants and animals for your paludarium. So, it’s time to get started and make your dream turn into reality!
1. Get all the Materials and Clean them
Grab all basic tank essentials and clean them with hydrogen peroxide solution. Ensure you wear gloves during the process. Set up the tank and test it for leaks by filling it with distilled water.
Other than everything mentioned above, you must also get zip ties, a hot glue gun, and super glue. These will help you fix most objects in place if the foam sealant doesn’t help.
2. Take Inspiration
Look up paludariums online (YouTube, Instagram, Reddit, and even competition sites), and you will find loads of references. Notice which kind of setup attracts you and is easy to recreate.
To ensure you have a natural design, take aquscaping tips and incorporate them here to make the setup aesthetically pleasing. Look up our guide on aquascaping for beginners to learn the right alignments and elevations.
3. Start Mapping
Choose how much water you want and where you want the land portions. Most people go for 20% water and 80% land distribution. Decide how you want to go about with your plan.
Usually, it’s best to work on the land first and water later. Plexiglass is a good divider material between two environments. It helps to avoid flooding your land region. Fix the glass with a silicone-based glue.
4. Begin Building the Land
To decorate the land portion, plan the shape and structure with egg crates. Use foam sealant to stick things together. You can also carve shapes into structures made solely out of foam sealant.
Use various materials like sand, rocks, and wood. Even bowls and pots (upside-down) can be a great addition.
While picking items, prioritize those that are easy to clean and won’t trap too much waste. Have drainage at the bottom of the land to avoid flooding in case water fills in mistakenly.
5. Add Substrate and Plants
Choose the specific substrate and plant suitable for the type of environment you’ll build. Start strategically placing the substrate and plants.
You can also create a canopy made of plants or hardscape. This will be a shaded region for your terrestrial animals.
6. Make a Half-submerged Area
If you plan to have semi-aquatic animals, then build a land area that isn’t completely immersed. Use a floating shelf of PVC, driftwood, or cork. Cover the shelf with moss (as an additional source of food) or peat (for a bog-like look).
If you want a waterfall, install it during this step.
7. Focus on the Water Region
Once the land region is done, spruce up the bottom region with substrate and add water. Let that settle for around 3 days.
During this time, you can either leave the setup untouched or work more on the land level.
After that, if you want to add structures like caves and waterfalls, make sure you take enough time to let them dry.
8. Add all Basic Necessities
Install filters, heaters, pumps, pipes, lights, humidity maintenance setups, and other necessary equipment. Cover the systems amidst your setup with natural elements to hide them and not make them look out of place.
9. Test the Setup
If all the things are set up, it’s time to test-run the entire setup. Add distilled water and notice whether everything is steady in its place. Check if all the essential equipment are working fine.
If anything seems wobbly, don’t take risks and strengthen it in appropriate ways.
10. Cycle the Tank
If everything is set, then don’t hurry to add animals right away. Take time to cycle your tank for 6-8 weeks. We have a detailed guide on that, so make sure you follow it if you don’t know how. Test the pH, ammonia, nitrite, and nitrate levels in the end.
11. Add a Cleanup Crew
Before you put all fish and terrestrial species, add a cleanup crew and let them settle in. This will further support the tank cycling process. Once you let them be for a few weeks, check for all water parameters.
12. Gradually Introduce New Inhabitants
Buy your animals and quarantine them – for at least 2 weeks. If everything is steady, slowly add your animals
For fish, place them in the tank while inside a water-filled plastic bag. Slowly add a little tank water to the bag to get accustomed.
For invertebrates, place them in a container. Now siphon tank water into the container via a hose. Let water drip until the invertebrates are totally submerged. If there’s no adverse reaction, introduce them to the tank.
In the case of amphibians, introduce them while within the container from the pet store into the tank. Switch off the lights and open the container. Observe the animals to step out and let them explore for an hour. After that, turn on the tank lights.
A word from FishInAquarium
While creating a paludarium is a unique hobby, remember it’s not an easy one. Try this only if you’re confident about your fishkeeping skills and also have a slight idea of aquascaping.
The journey of your first paludarium will definitely be challenging. You may have trouble creating the aesthetical structures or constantly second-guess yourself. But remember, patience and confidence together will help you sort things out!
With that being said, if you’re satisfied with the things you learned here, share it with fellow hobbyists. Begin your journey together to boost your confidence.
And if you run into any setbacks, don’t forget to send us an email, and we’ll take it up from there!